



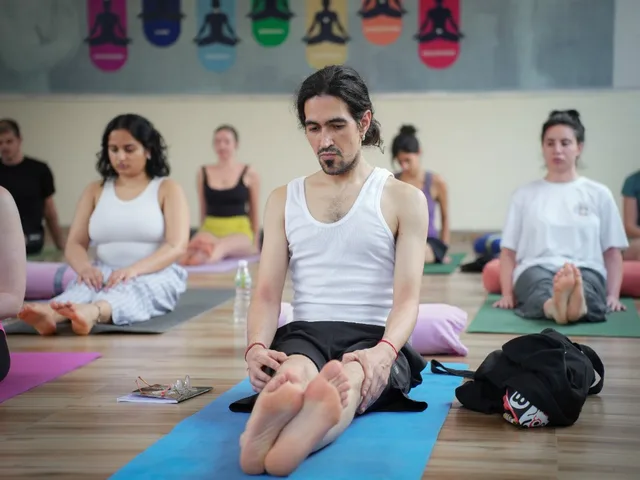
You do not need to be flexible to start yoga. You do not need expensive clothes, a studio membership, or the ability to stand on your head. You need a flat surface, comfortable clothing, and 15–20 minutes. These 10 yoga poses for beginners are the ones we teach on Day 1 of every training course at DivinePath Yoga School & Retreat — because they work for every body, require zero experience, and build the foundation for everything that comes after.
Each pose below includes what it does, how to do it properly, and the one mistake beginners make most often. The poses are ordered from simplest to most demanding, so you can work through them as a sequence or pick whichever ones your body needs today.
Beginner yoga poses are positions that require no prior flexibility, strength, or balance training to attempt safely. They teach your body the fundamental movement patterns of yoga — standing tall, folding forward, bending backward, twisting, balancing on one leg — without demanding the range of motion that advanced poses need.
The Sanskrit word for a yoga pose is “asana.” You will hear both terms used interchangeably. “Tadasana” is Mountain Pose. “Balasana” is Child’s Pose. Learning the Sanskrit names is not required to practise, but it helps if you ever attend a class where the teacher calls poses in Sanskrit (which many do).
The 10 poses in this guide cover standing, seated, prone (face-down), supine (face-up), and balancing positions. Together, they move your spine through every plane of motion, stretch your major muscle groups, and build the body awareness that all yoga — beginner or advanced — depends on.
Stand with your feet together or hip-width apart. Arms by your sides, palms facing forward. That is it. You are in Mountain Pose.
Looks like nothing is happening. Everything is happening. Your weight should be evenly distributed across both feet — not leaning forward onto your toes or backward onto your heels. Your kneecaps lift slightly (quads engaged but not locked). Your pelvis is neutral — not tilting forward (duck butt) or tucking under. Your shoulders drop away from your ears. The crown of your head reaches up.
Why it matters: Mountain Pose teaches you how to stand properly. Most people stand with their weight on one leg, their shoulders rounded, and their lower back compressed. Tadasana corrects all of that. Every standing pose in yoga begins and ends here. If your Mountain is crooked, everything built on it will be crooked.
Common mistake: locking the knees. Keep a micro-bend. Locked knees restrict blood flow and put stress on the joint. Hold for 30–60 seconds, breathing steadily.
Kneel on the floor. Big toes touching, knees apart (as wide as your mat if your hips are tight). Sit your hips back toward your heels. Walk your hands forward and lower your forehead to the ground. Breathe.
This is the pose you go to when you need rest during any yoga class. Nobody judges you for taking Child’s Pose. It stretches the lower back, hips, and ankles while calming the nervous system. The forehead touching the ground activates a pressure point that triggers relaxation. Three to five slow breaths here can reset your entire state.
Watch out for: forcing your hips all the way to your heels when they do not want to go there. If your hips hover above your heels, place a folded blanket between your hips and calves. The pose should feel like resting, not straining.
Start on all fours — hands under shoulders, knees under hips. Inhale: drop your belly toward the floor, lift your chest and tailbone, look slightly up. That is Cow. Exhale: round your spine toward the ceiling, tuck your chin, draw your belly button toward your spine. That is Cat. Flow back and forth with your breath.
Cat-Cow is the best spinal warm-up in yoga. It moves your backbone through flexion and extension, loosening the muscles along the spine, waking up the discs, and teaching your body to coordinate movement with breath. Five to ten rounds at the start of any practice prepares your back for everything that follows.
What most people get wrong: only moving from the middle of the back. The movement should flow from the tailbone through every vertebra to the crown of the head. Think of it as a wave, not a hinge.
The pose that shows up in every yoga class ever taught. From all fours, tuck your toes, lift your knees off the floor, and press your hips up and back. Your body makes an inverted V shape. Hands shoulder-width apart, fingers spread wide, pressing through the whole palm. Feet hip-width apart.
Here is the truth about Downward Dog: most beginners cannot straighten their legs in this pose, and they do not need to. Bent knees are completely fine. The priority is a long, straight spine — not straight legs. If you straighten your legs at the cost of rounding your back, you are doing the pose wrong. Bend your knees, lengthen your spine, push the floor away with your hands. Hold for five to eight breaths.
What it does: stretches hamstrings, calves, shoulders, and the entire back body. Builds arm and shoulder strength. Reverses the effects of sitting. This one pose, done properly, addresses half the physical complaints of modern life.
Common mistake: dumping weight into the wrists. Spread your fingers and press through your knuckles and finger pads. Think about pushing the floor toward the wall behind you, not just pressing down.
Lie face down. Place your hands beside your lower ribs, elbows bent and tucked close to your body. Press the tops of your feet into the floor. Inhale and peel your chest off the mat using your back muscles — not your arms. Your hands are there for support, not for pushing.
Cobra opens the chest and strengthens the muscles along your spine. If you sit at a desk all day, your upper back rounds forward and your chest collapses. Cobra reverses that pattern. Start small — a baby Cobra where your chest barely lifts. Add height over weeks as your back gets stronger. There is no rush to straighten your arms (that is Upward Dog, a different pose).
The neck thing: do not crank your neck back to look at the ceiling. Keep your gaze forward and slightly up. The backbend happens in your mid and upper back, not your neck. If your lower back pinches, lower down a few inches.
Sit on the floor. Bring the soles of your feet together and let your knees drop open to the sides. Hold your feet or ankles. Sit tall.
Most beginners look at this pose and think their knees should touch the floor. They will not. Not for months, maybe not for years. And it does not matter. The pose works regardless of how far your knees drop. It stretches the inner thighs, opens the hips, and gently loads the groin muscles. Sitting tall is more important than pressing your knees down. If your lower back rounds, sit on a folded blanket to tilt your pelvis forward.
Hands off the knees. Pushing the knees down with your hands or elbows. Let gravity do the work. Forced stretching on the inner groin can strain the adductor muscles. Relax and breathe. Hold for one to two minutes.
Step your right foot forward into a lunge. Turn your back foot out about 45 degrees. Bend your front knee to 90 degrees (or as deep as comfortable). Lift your arms overhead, palms facing each other. Square your hips toward the front of the mat.
Warrior I builds leg strength, opens the hip flexor of the back leg, and creates a full-body line from your back foot through your fingertips. It looks simple. Holding it for 30 seconds with proper alignment while breathing calmly is surprisingly demanding. Your front thigh burns. Your shoulders fatigue. Your back hip wants to rotate open. Fighting all of that while staying steady is what makes Warriors so effective.
Common mistake: letting the front knee collapse inward. Your knee should track directly over your ankle, pointing the same direction as your toes. If the knee drifts inward, you are loading the ligaments instead of the muscles. Shorten your stance if needed.
Stand on your left leg. Place the sole of your right foot on your inner left thigh or calf (never on the knee). Bring your palms together at your chest or reach your arms overhead. Find a fixed point on the wall to stare at. Breathe.
You will wobble. Everyone wobbles. Tree Pose is not about being perfectly still. It is about falling off balance and finding it again, over and over, while keeping your breath steady. That is actually the whole point — the wobble trains your ankle stabilisers, your core, and your ability to focus when things are unstable. If you need to, keep your toes on the floor instead of lifting the foot to your thigh. Standing on one leg for 30 seconds is an achievement at any level.
Never on the knee. Placing the foot on the knee. This creates dangerous lateral pressure on the knee joint. Foot goes above the knee (inner thigh) or below it (calf). Never on it.
Lie on your back. Bend your knees, plant your feet flat on the floor hip-width apart. Arms by your sides, palms down. Press through your feet and lift your hips off the floor. Your body forms a straight line from shoulders to knees.
Bridge strengthens glutes, hamstrings, and lower back while opening the chest and hip flexors. It is the safest backbend for beginners because the floor supports your shoulders and the range of motion is controlled by how high you lift your hips. Squeeze a block between your knees if your legs tend to splay apart. Hold for 30 seconds. Lower slowly, one vertebra at a time.
Less is more here: pushing the hips so high that the lower back pinches. Lift only as high as you can while keeping a feeling of length in the spine. Higher is not better if it compresses your lumbar vertebrae.
Lie flat on your back. Legs slightly apart, arms by your sides with palms facing up. Close your eyes. Let every single muscle in your body release. Do nothing for 5–10 minutes.
The hardest pose on this list. Not physically — there is zero physical demand. The difficulty is mental. Lying still, doing nothing, thinking nothing, while your to-do list screams at you from inside your head — that is the practice. Savasana is where your body absorbs the benefits of every pose you just did. Skipping it is like baking a cake and taking it out of the oven 10 minutes early.
Stay awake. Treating Savasana as nap time. Stay awake. Stay still. If your mind races, that is normal. Notice the racing without chasing the thoughts. Five minutes of genuine stillness at the end of practice does more for your nervous system than an extra 15 minutes of poses.
Three more poses sit just beyond the Day-1 ten. Add them once Mountain, Warrior I, and Downward Dog feel familiar. They were the unique asanas from an older beginners guide now merged into this page.
From Downward Dog, shift forward until your shoulders sit over your wrists and your body makes one straight line from heels to crown. Press the floor away. Keep the core, quads, and glutes switched on so the hips neither sag nor pike.
Plank builds the core and wrist strength that later poses depend on. Drop the knees to the floor if the full hold shakes after a few breaths. That is still Plank — a straight line from knees to crown is the alignment that matters.
Do not dump into the lower back. If the belly drops, the lumbar spine takes the load. Shorten the hold, or take knees down, rather than hanging in a banana shape.
From Warrior I, open the hips and torso to the long side of the mat. Stretch both arms to a T, parallel to the floor. Gaze over the front middle finger. Keep the front knee stacked over the ankle and the outer edge of the back foot grounded.
Warrior II strengthens the legs and opens the hips without the overhead arm demand of Warrior I. It is the standing pose most people meet next in a beginner class, and it trains stamina more than flexibility.
Watch the front knee. Letting it collapse inward or shoot past the toes stresses the joint. Track the knee toward the middle toes and keep the shin close to vertical.
From Warrior II, straighten the front leg. Reach the front arm forward, then rest that hand on the shin, a block, or the floor. Stack the top arm toward the ceiling. Gaze up at the top thumb, or look forward if the neck complains.
Triangle stretches the hamstrings and side body while keeping both feet on the floor — a more stable standing shape than the Warriors once the legs are tired. Use a block under the bottom hand; reaching the floor is not the goal.
Do not lock or hyperextend the front knee. A micro-bend keeps the joint safe while you lengthen the side waist. If the hamstring yells, the hand goes higher, not lower.
Warm up before going deep. Cat-Cow and gentle twists before standing poses. Never start with Warrior I on a cold body. Three to five minutes of warm-up prevents injuries that take weeks to heal.
Pain is not progress. Dull stretch is normal. Sharp pain, tingling, or numbness means stop immediately. Yoga should never hurt. If a pose causes pain, modify it or skip it. At DivinePath Yoga School & Retreat, we teach students to distinguish between productive discomfort (muscles working) and harmful pain (joints, nerves, or acute strain).
Breathe through your nose. Steady nasal breathing throughout every pose. If you are holding your breath, you have gone too deep or too fast. Your breath is the most honest feedback mechanism your body has. Listen to it.
Use props without ego. Blocks, blankets, straps, and walls are not crutches. They are tools that let you hold poses with better alignment for longer periods. A Downward Dog with blocks under your hands and bent knees is better yoga than a straight-legged version where your back rounds and your wrists scream.
Skip poses that do not feel right today. Your body is different every day. A pose that felt great yesterday might feel wrong today. Honour that. Substitute something gentler. Yoga is a decades-long practice, not a single session where you must do everything.
If you are starting from zero, here is a 15-minute beginner sequence using the poses from this guide:
Do this every morning for 30 days before adding new poses or extending the time. Consistency matters more than complexity. Fifteen minutes daily beats 90 minutes once a week.
Here is the quick reference table for all 10 poses:
| English name | Sanskrit name | Primary benefit |
|---|---|---|
| 1. Mountain Pose | Tadasana | Posture, grounding, body awareness |
| 2. Child’s Pose | Balasana | Rest, lower back release, calming |
| 3. Cat-Cow Pose | Marjaryasana-Bitilasana | Spinal mobility, warm-up |
| 4. Downward‑Facing Dog | Adho Mukha Svanasana | Full-body stretch, strength |
| 5. Cobra Pose | Bhujangasana | Chest opening, back strength |
| 6. Bound Angle Pose | Baddha Konasana | Hip opening, inner thigh stretch |
| 7. Warrior I | Virabhadrasana I | Leg strength, hip opening, focus |
| 8. Tree Pose | Vrikshasana | Balance, concentration, stability |
| 9. Bridge Pose | Setu Bandhasana | Glute strength, chest opening |
| 10. Corpse Pose | Savasana | Deep rest, nervous system reset |
You do not need to memorise the Sanskrit names to practise at home. They become useful when attending classes or studying yoga philosophy, where teachers often use the Sanskrit terms alongside English. At DivinePath Yoga School & Retreat, we teach both names during our teacher training so graduates can cue classes for any audience.
Flexibility improves faster than you expect. Most beginners gain 2–4 inches of forward fold range within the first month of daily practice. The hamstrings, hip flexors, and shoulders — the three tightest areas for desk workers — respond quickly to consistent stretching. You will not become a contortionist, but you will move more freely.
Strength builds where you need it most. Poses like Warrior I, Downward Dog, and Bridge target the muscles that modern life weakens: glutes, upper back, core, and shoulder stabilisers. You are building functional strength that helps you carry groceries, climb stairs, and sit without back pain — not just yoga-specific strength.
Stress drops measurably. Steady nasal breathing and held poses activate the parasympathetic nervous system. Your heart rate slows. Cortisol decreases. Muscle tension releases. Fifteen minutes of yoga produces a calming effect that lasts hours. This is not a feeling. It is a measurable physiological response.
Sleep improves. Evening yoga — especially Cat-Cow, Child’s Pose, and Savasana — downregulates the nervous system and prepares the body for rest. Students at DivinePath consistently report better sleep quality within the first week of daily practice.
Body awareness grows. After a month of yoga, you notice things you used to ignore: how you stand, where you hold tension, when you stop breathing under stress, which side of your body is tighter. This awareness extends far beyond the yoga mat. It changes how you sit at your desk, how you walk, and how you respond to physical discomfort.
You do not need a perfect morning routine, a yoga mat, or a plan. You need the floor and 15 minutes. Start with Mountain Pose. Move through Cat-Cow. Try one Warrior. Lie down in Savasana. That is yoga.
If you want structured guidance, daily practice with a teacher, and a community of fellow beginners, DivinePath Yoga School & Retreat runs beginner-friendly yoga teacher training in Goa ($899, 21 days), Rishikesh ($950), and Bali ($1,550). About 40% of our students start with less than a year of experience. The 10 poses in this guide are what we teach on Day 1.
Your body already knows how to do this. It just needs permission to start.
About 40% of DivinePath students start with less than a year of experience. Day 1 covers the same 10 beginner asanas in this guide — with teachers correcting alignment in the room.
Mountain Pose (Tadasana), Child’s Pose (Balasana), and Cat-Cow (Marjaryasana-Bitilasana) require zero flexibility or strength and can be done by anyone on Day 1. Bound Angle Pose (Baddha Konasana) and Corpse Pose (Savasana) are also very accessible. Start with these five if the full list of 10 feels like too much.
Five to seven poses per session is a good starting point. The 15-minute routine in this guide uses 8 poses plus warm-up and Savasana. You do not need to do all 10 every time. Pick the ones your body needs today and do them well. Quality of alignment matters more than quantity of poses.
Yes. Gentle yoga is safe for daily practice. The 10 beginner yoga poses in this guide are low-intensity enough to repeat every day without risking overuse. Listen to your body — if something feels sore, rest that area and focus on other poses. At DivinePath, students practise twice daily during teacher training and their bodies adapt within the first week.
All 10 poses in this guide work at home with no equipment. Mountain Pose, Cat-Cow, Downward Dog, Cobra, and Savasana need only a flat floor. For Bound Angle and Bridge, a folded towel under your hips replaces a yoga block. No mat? Use a carpet, rug, or even a clean floor. The poses do not care about your equipment.
20–30 seconds per pose for the first two weeks. Build to 30–60 seconds as your body adapts. Savasana should be held for 3–5 minutes minimum. Cat-Cow is a flowing movement (5–10 rounds) rather than a static hold. The general rule: hold long enough that your breath becomes steady, but not so long that your form collapses.
Yoga Alliance Registered Yoga School — RYS 200, 300 & 500 · School ID 457520
 Yoga Alliance RYS 200, 300 & 500
School ID 457520
Verify registration →
Yoga Alliance RYS 200, 300 & 500
School ID 457520
Verify registration →
Divinepath Yoga School & Retreat © 2026. All Rights Reserved.

Student & Visitor Comments
Be the first to leave a comment.
Leave a comment